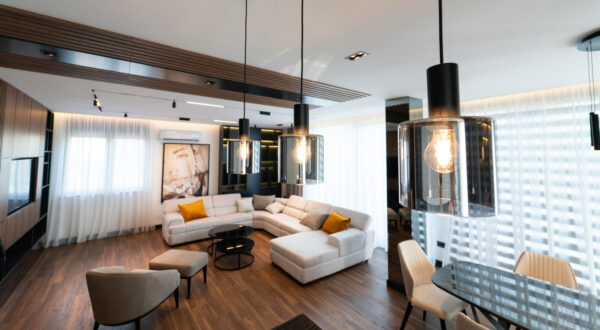
It’s only when you start thinking about designing your space, whether it’s an apartment, a house, or a yacht interior, that you realize how little is actually said about the process itself. Most of the content available focuses on the finished look, beautiful photos of interiors posted online. However, behind every successful design, especially in yacht interior projects, there is a well-structured process.
A good interior designer will take care of all the details for you. This guide is here to help you understand how the process works and what to expect when collaborating with the experienced team at Salt & Water Studio.
The process starts with dialogue, something we all do every day: talking. Communication is the foundation of everything because it leads to understanding, and understanding leads to good design.
In this introductory design phase, there are five key steps:
- The design brief and identifying your visual style: to ensure the design is aligned with what truly suits you from the start.
- Developing the 2D layout and design concept: to make sure the space is both functional and coherent as a whole.
- Creating a moodboard: to define the desired atmosphere and style visually.
- Presenting a sample board to see how different elements work together in terms of color, material, texture, and relationships.
- Technical drawings of internal elements: to ensure every detail matches your habits and how you use the space.
These steps together form a strong foundation on which the entire design is later built, whether it’s a luxury residence or the interior of a motor yacht or sailing boat.
What Happens at the First Meeting?
The first meeting is dedicated to a detailed conversation that will help you clearly express what you want. There’s no need to worry about forgetting something, the design team has a well-developed checklist based on years of experience. It covers your lifestyle, needs, and preferences that will help shape a space tailored specifically to you.
Step 1: The Design Brief and Defining Your Visual Style
Everything you share during the conversation is collected into a design brief, a document that becomes the foundation and guide for the entire design process. Once defined, it becomes the anchor of the project. At the end, when you look at the final design and see the brief has been fulfilled, it’s a clear sign the project has gone in the right direction with fewer unexpected changes, additional costs, or delays.
Next comes defining your visual style. Through images and inspirational examples, the design team explores what truly appeals to you. Since people often interpret the same words differently, this step ensures your preferences and the atmosphere you’re aiming for are clearly understood.
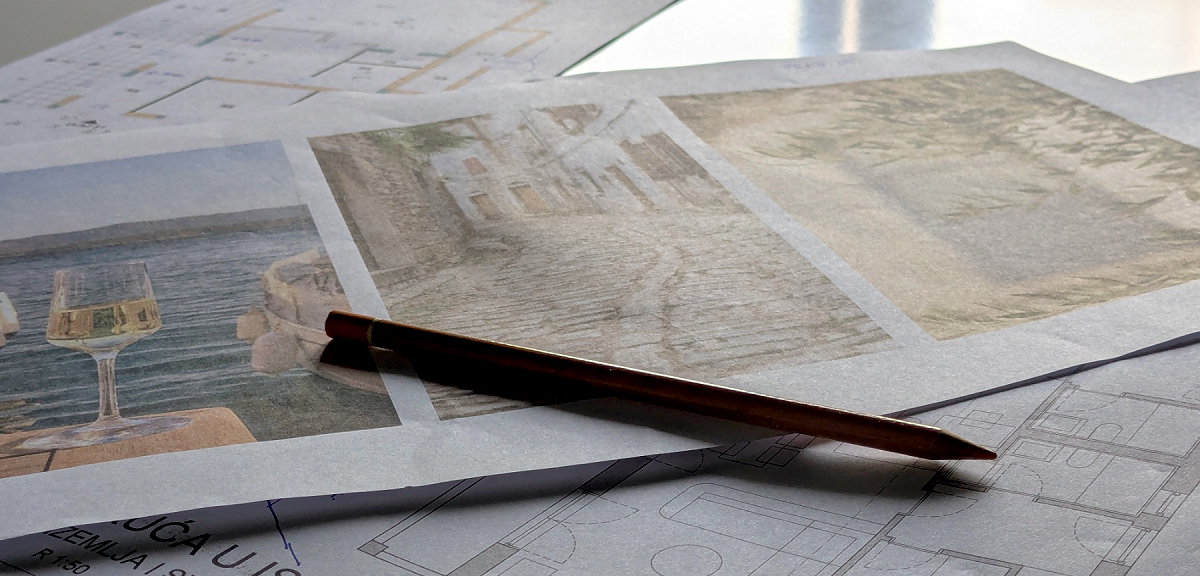
Step 2: Defining the Layout and Developing the Concept
This step focuses on one of the most important tasks, exploring all possible layout options using 2D plans. The Salt & Water team analyzes your needs and available space, evaluating which options work best. You’ll go through a curated selection of layouts together and decide on the one that best fits your daily habits and spatial needs.
This step sets the foundation on which the entire project is built. It gives you the confidence that the space will match how you live and how you want to feel in it.
Alongside the layout, the concept of the space is also developed. This is the moment when a deeper narrative emerges. What feeling should the space evoke? What activities should it support? What energy should it carry? The concept acts as the guiding idea that brings all design elements together, from materials to lighting, into a cohesive whole that supports your lifestyle.
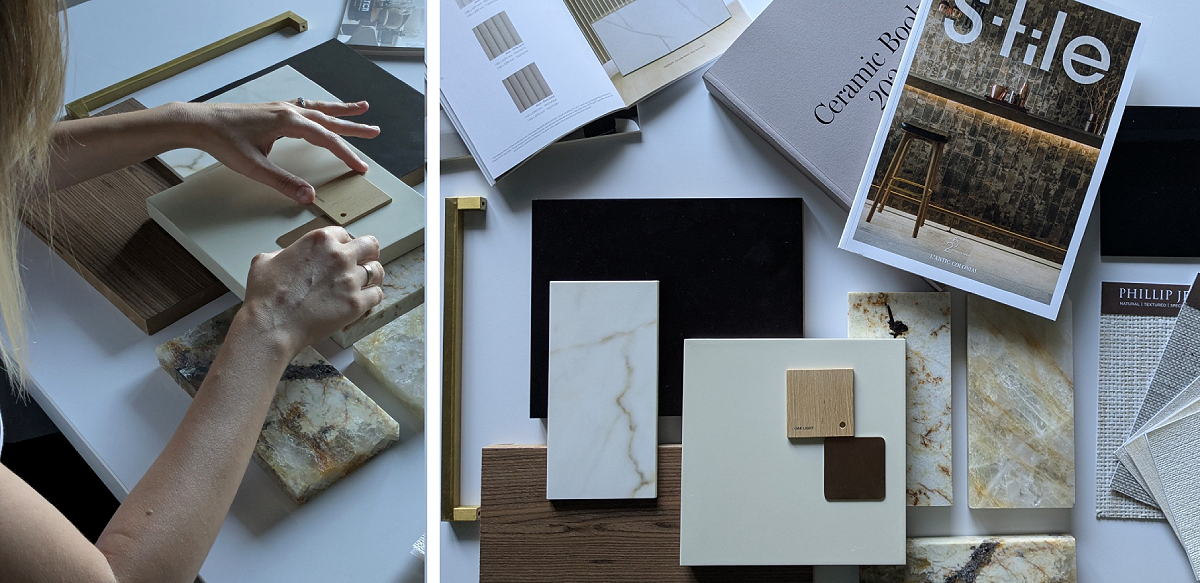
Step 3: Moodboard, the Beginning of a Visual Story
Moodboards are collages that visually capture the mood, style, and feeling of the space you want to create. They’re made up of colors, textures, images, and ideas that give a first impression of the future interior.
In this step, you and the design team explore possibilities, identify what resonates with you, and open a creative dialogue. A moodboard is the perfect tool, it allows you to see and respond to ideas while everything is still flexible.
It’s not just a source of inspiration; it’s the base for the next steps in the process. Do you imagine a space that feels like a calm Mediterranean afternoon? Or perhaps one with industrial elegance that speaks of modern luxury? The moodboard is where those visions begin.

Step 4: Sample Board – Turning Ideas into Tangible Elements
The sample board is where abstract ideas start to become concrete. This board displays the colors, textures, and materials the designers plan to use in your project.
What makes this step unique is that it helps you experience how individual elements will work together. This is the moment to test combinations, refine details, and make sure everything feels balanced.
For you, as the client, the sample board provides clarity and reassurance. There’s no guessing; everything is visible and can be discussed before moving forward. This is especially important because a space isn’t experienced only visually. You’ll also discover how materials feel to the touch and how they interact in real life.
Step 5: Technical Drawings that Ensure Future Functionality
Functionality is just as important as aesthetics. In this step, you’ll work with the designers to review detailed technical sketches for the galley, wardrobes, storage areas, and more. You’ll also discuss how these spaces will function based on your daily routines, before any visual designs are developed.
This approach avoids having to sacrifice practicality for appearance. At Salt & Water, we believe that if something works well, it can, and should, be beautifully designed. These two aspects go hand in hand.
Often, online renderings look beautiful but turn out to be impractical in real use, especially in yacht interiors, where every centimeter matters.
What Comes Next?
Only after all of these steps are completed does the design team begin working on 3D visualizations. Thanks to the solid groundwork, you can be sure that what you see in the renders will truly reflect your wishes and expectations, whether you’re designing a home or a yacht interior.
Time Invested Early is Value You’ll Feel Later
To go through all these steps, you only need to bring time, openness, and a positive mindset. No special preparation is needed, just trust in a process built to provide clarity and confidence.
Spending time up front, although it may seem unusually detailed, ensures that the final design solution is fully aligned with your needs.
Because of this, there are no unpleasant surprises later on. Instead, there’s a quiet sense of satisfaction that comes from knowing someone really listened and understood you, and transformed it all into a three-dimensional space.
That’s what separates a space that simply looks good from one that feels like yours. A place where you enjoy every moment, because it truly supports your lifestyle, a space you live in with ease.